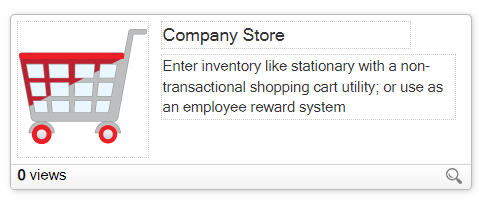
The Company Store can be used for posting items for sale, such as branded logo wear, or internal inventory tracking. The ability to create multiple company stores on your intranet allows you to use this application in different ways.
Employees can shop online with the Company Store app, which has a built-in shopping cart and inventory tracking. While it's not possible to process payments, it can be used to show the value of the item the employee would be buying, implement some type of points purchasing system, or use is strictly for swag and inventory tracking. You can also apply tax to items at the app level within the App Admin: Properties screen.
Uses of the Company Store
Using the standard Company Store application you can create an online store for:
- Branded logo supplies
- Employee recognition and incentives
- Office supply orders
- Technology and work station orders
You can set up categories and sub-categories to easily organize your Company Store as well a security permissions and set global searching of your Company Store.
Build Your Company Store
Start by following the process to add an App to a site.
Once you have the App in place, on the App card change the title and/or description if you want to customize it for your intranet. You might want to name it something that relates to your company, or have employees develop their own name. Click Create if you'll return to it later, or Build if you want to start customizing or adding content right away.

After creating your Company Store, you'll need to add Categories, such as Logo Items or Office Supplies, before you can add items. Each Category can also have subcategories, such as Golf Shirts or Pens.
To access Categories and Subcategories, as an Admin, hover over the Admin icon in the Toolbar, click AppAdmin, and click Manage Categories. At this point, you can see links to add categories and add sub-categories. Add groupings that make sense for the items you want to include in your Store.
Each category has its own security, access, and advertising options, available through Manage Categories.

Choose which Fields you want to use in your Company Store, by hovering over the Admin icon in the Toolbar, clicking App Admin, and choosing Manage Fields. Deselect the checkboxes of any fields you don't want to use, or make specific Fields required.
You can also add Cart Managers under App Admin, who are responsible for processing orders when carts are checked out.
Add Items to the Company Store
The first step in adding items to your Store is to create Categories, as in the previous section.
- As an Admin, click within a Category.
- On the top right side, click Add.
- Set the Category and Subcategory of the item as needed.
- Product Name is a required field, so give your product a descriptive name.
- Add as other fields as appropriate for the item, including an image, quantity, etc. None of these fields are required, so it's up to you what to include. If you want to track inventory, be sure to include a Quantity.
- Scroll down and click Preview to see what users will see. The item isn't available to users at this point. If you want to edit any of the fields, click Change.
- Once you're satisfied with your item preview, click Publish.
- Choose whether you want to advertise the item.
- Click the Publish button to add it to the Store for users.
Watch the entire process of creating a Company Store in this quick video:
Edit Items in the Company Store
You can edit any of the fields for any of your items.
To edit an existing item, go to where the item is listed, click the edit pencil on the right, and make your changes. Click Save to finalize the changes.
Cart Management
As an App Admin you have the option of assigning a Cart Manager. Cart Managers are responsible for processing orders when carts are checked out.
Cart Managers have elevated rights within the application which allow them to:
- update cart quantities
- remove cart items
- view historical cart data
- receive notification of pending carts
- add/edit application content
- assign items to sale/features create custom content boxes
You can assign unlimited Cart Managers, but the ability to process orders is on a first come basis. One manager must be assigned as the Primary Contact, who will receive requests about items and App function.
To assign a Cart Manager:
- Hover over the Admin icon in the Toolbar.
- Click on App Admin.
- Under Permissions, click Assign Cart Managers.
- Click on a user name, or Ctrl-click on multiple names (then scroll down to select a Primary Contact).
- Click the Save button.
User Shopping Carts
As with any online shopping experience, Company Store users can:
- add items to a cart individually or in a quantity
- update or delete items in their cart
- review their cart
- continue shopping and add more items
- proceed to checkout
Users' carts are always available to them by clicking My Cart, top right in the Store.
Related Articles