With the demands of hosting information on an intranet, we've come across a few cases where our customers are looking to silo information with multiple teams, sister companies, etc.
Landing Page
This page is seen by all employees with access to the intranet, we recommend making the most of this by still having employees view all updates and important information relevant to the organization as a whole, and then have them choose their own 'adventure' by selecting a link to navigate them to the appropriate page relevant to their part of the organization.
Customers that have implemented something similar have usually gone with a what's new feed on the homepage to broadcast important news, and then had graphics showing options for the various locations/departments, etc.
An example of how this may look on a page:
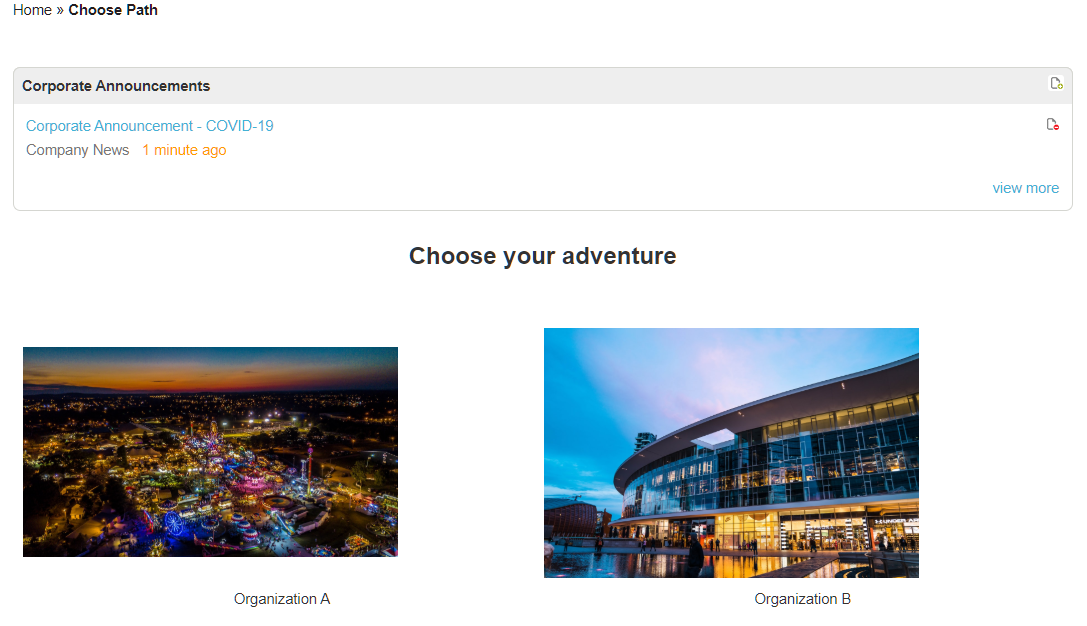
By allowing the employee to choose the path relevant to them, they remain able to receive corporate-wide announcements and still get to the information relevant to them.
For the Images above, you would use a Message Box widget. This is where you can get creative with the images used, any information that you want to provide to staff (e.g. directions of how to find information, multiple images used to direct them as needed, etc.)
For the edit view of this page, we created a table and put the images inside to make the image and text to have more control on where things sit on the page. We also removed the border of the table by right-clicking and choosing 0 for the border size as shown below:
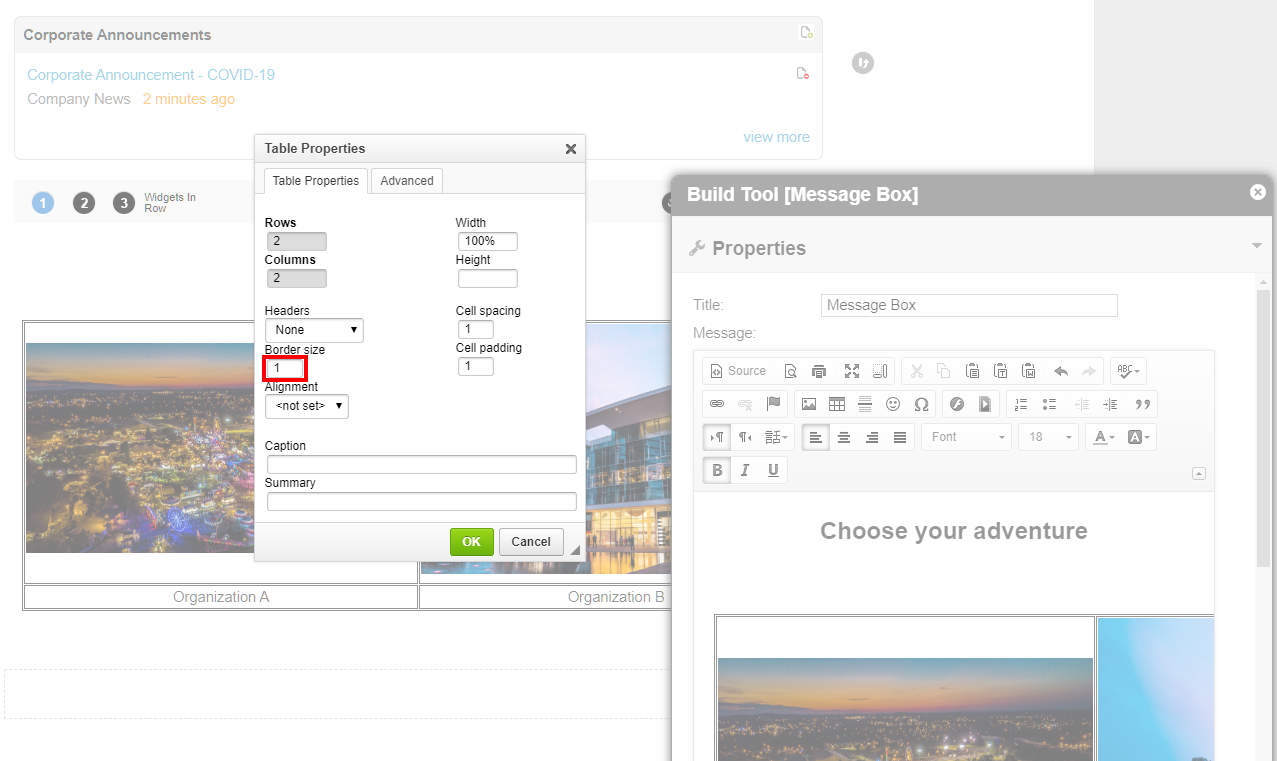
Depending on if you have a graphic artist on staff, or someone familiar with Photoshop, you could even add text on top of the image so that you can just arrange the images without having to order the text as well.
Department/Location Sites
Now that you have a landing page, it'll need to point to the dedicated resource for the intended team/department/location. As a recommendation, use a Site to handle the various team/department/location-specific content. It's much easier to coordinate permissions by locking down the sites to the intended groups of users than it is to handle it one-by-one using folder permissions within apps.
Locked sites by organization:
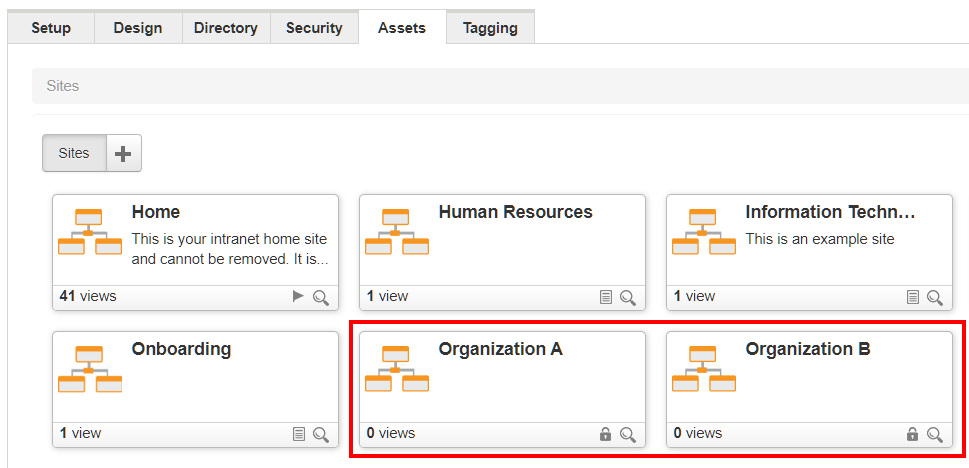
Above, you'll see a locked symbol in the bottom-right corner of the site card indicating the site is locked. This means only users/groups, and Admins on the intranet will be able to access the content within these sites.
Note: Content that needs to be accessible by all should live on the Home site within an application (i.e. documents, news, etc).
Security
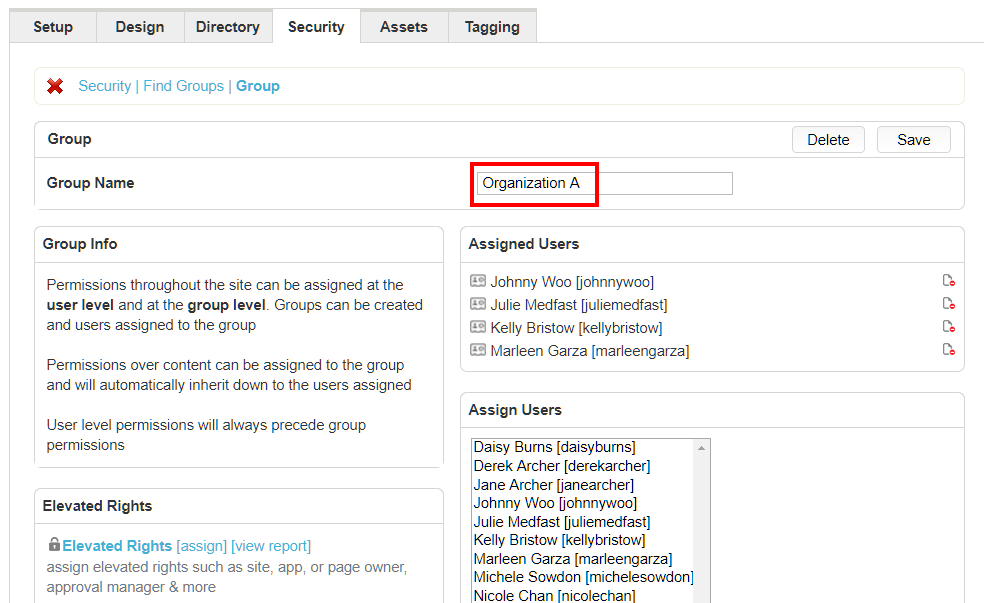
The best way to handle security is by using groups. If you're syncing over security groups from Active Directory, this is the easiest set up to maintain as you can manage the group memberships there, and users added or removed from these groups will be reflected in the intranet.
If you don't use Active Directory or sync security groups from AD, you can still implement group security but the users within these groups will need to be maintained on the intranet manually.
To maintain groups, go to Admin > Security tab > Create a Group.
Once you've added the groups to your intranet, you're ready to update the sites to include these groups going forward.
To configure the security of the team site, navigate to Admin > Assets tab > select the site > click Site Access from the right menu:
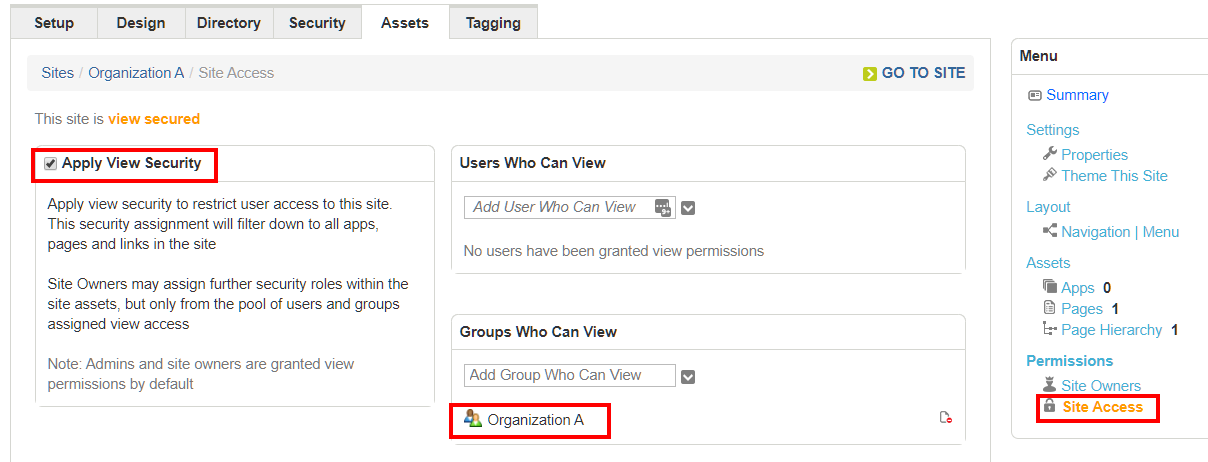
From this page, click the box next to Apply View Security and then add the groups/users as desired. You can also appoint admins of this site by clicking 'Site Owners' from the right menu.
Additional Considerations
Redirect users upon logging in - If you use a Form-based login (users enter their username and password manually, each individual user can be set to navigate to a specific location when logging in. This is set by navigating to Admin > Security tab > find logins and locate the user you wish to set the redirect path for. You'll need the link copied to your clipboard prior to editing this option on their account.
Save time by copying home page layouts - If you have a look and feel already set up on your current homepage, copy it and move it to the team sites you're creating. This is done by going to Admin > Assets tab > click into the site where the page lives (if it's your current home page, click Home) > click Pages. Hover over the home page card and click the copy icon that appears in the top right corner of the home page card. Name it as desired (you can change this later).
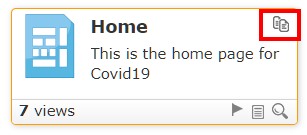
Once the screen updates and the new page card is there, hover over it and you'll see an arrow icon between the copy and trashcan icons.
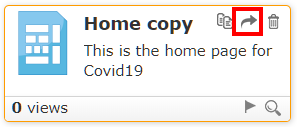
Click this icon to move the page to the desired site. You'll see a pop-up where you can select the site, once the site is selected, the page will refresh and you'll now be on the selected site with the page moved to it.
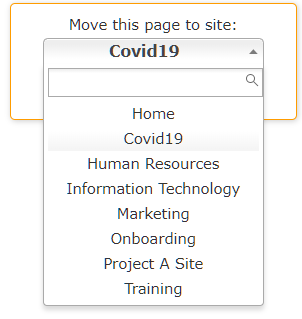
Repeat these steps for the number of sites you're creating this template from.