Please be aware, this feature is only available on v17.0.0 and above. You can find information about upgrading/patching here.
Pre-Requisites
This document assumes you have a Microsoft Azure account with the licensing required to use the "Entra ID" product (formerly known as Active Directory). If you wish to use Microsoft Graph to send emails, you will also need to have set up an existing Graph Connection in the intranet; you can find information about setting up an active Graph Connection here.
Setting up Graph Mail
1. Login to your Intranet site using an account that has Administrator or Super-Administrator permission and navigate to Admin Home | Security | Advanced Settings | Email Configurations.
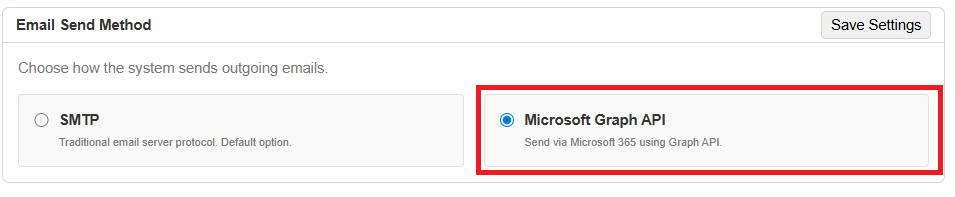
2. In the Email Configurations page select Microsoft Graph API.
3. Select the Graph Connection you wish to use.
Note: If you only have one active Graph Connection in your intranet it will automatically be selected.
4. Click on 'Verify Mail Permissions.'
Wait for the check to finish; this will return either a green, orange, or red message indicating the status of the graph connection and permission status in your intranet.
If the returned message is a red error message, it means the Graph Connection has not been setup correctly. Please review the Graph Setup guide here, and verify that you can successfully connect and sync with Graph. Or reach out to tech support.
If the returned message is orange and says "⚠ Connection successful, but missing Mail.Send permission. Please add Mail.Send (Application) permission in Azure Portal." The Graph connection was successful, but mail permissions have not been set up correctly. Go to step 5 for information on how to set this up.
If the returned message is green and says "✔ Connection successful. Mail.Send permission verified. Your application is ready to send emails via Microsoft Graph." You have successfully connected and set up mail-sending permissions. Go to step 6 to continue setting up Graph Mail.
5. Setting up Mail.Send Permissions.
Note: This is only required if the mail permission check has returned a message saying this permission is missing.
5a. In a browser navigate to the Azure Portal and login.
5b. Select App Registrations, and select the application used for your intranet.
5c. In the left navigation bar menu under Manage, select API Permissions.
5d. Click on 'Add a permission' and select the Microsoft Graph API.
5e. Select 'Application Permissions' and search for 'mail.send', select this from the list and click on 'Add Permission.'
5f. After adding the permission grant admin consent for MSFT for these new permissions. You can now go back to the intranet and click 'verify mail permissions' again.
6. Optional - Select a test mode setting.
Note: for Production/Live environments this should always be set to 'Off' to make sure emails are being sent to their intended recipients.
Redirect Mode: All TO, CC, and BCC recipients are replaced with a single test email address you specify. The subject line is prefixed with [TEST MODE]. Useful for testing email content and formatting without sending to real users.
Discard Mode: Emails are queued with a "Discarded" status but are never actually sent. The original recipients are preserved in the queue for audit purposes. This is ideal for development/testing environments where you want a complete audit trail without any emails being delivered.
7. Optional - Sending a test email.
If you wish to send a test email to verify mail is being sent correctly, you can do so here once you go ahead and finish setting up Graph Mail and saving the settings. Enter in the email address of the user you wish to send a test email to, and the next time the mail queue scheduled task runs, it will verify that the email has been received.

8. Optional - Modifying the email queue settings.
In previous versions of the intranet, Lucee SMTP mail was used exclusively to send mail. This allowed administrators to go into Lucee Web Admin and view the outgoing mail. When using Graph Mail emails will get placed into an outgoing queue, which can be viewed in the Graph Mail Dashboard. This queue has the following settings, which can be configured:
Queue Processing Interval:
This is how often the background scheduled task responsible for querying through the queue and sending emails using the API runs. The default for this is every 5 minutes, but admins can pick from a selected dropdown if they wish to have this run more/less often.
Maximum Retry Attempts:
This is the number of times a specific email gets retried if the email has failed to send using the API. The default for this is 5 attempts, which mirrors the setting in Lucee Web Admin, Admins can now pick the number of retries if they wish to have this retry more/less often.
Queue Cleanup Age:
This is the number of days emails that have been accepted or failed after the max number of tries get deleted from the queue. You can customize the number of days to keep old emails before they are deleted or set it to 'Forever' if you wish to keep outgoing mail for auditing or other purposes.
9. You have now setup and configured everything required for mail to work with Graph. Save the changes, and you're ready to go!
For further user documentation on the Graph Mail Queue Dashboard feature, you can click the link to the article here.